Olive fever with Olive Bread!

As a child , I used to crave a lot on Meditteranian Cuisine and olives would be my best mates.I remember the transparent bags of olives that my mom used to pop out of her kitchen when shes all set to serve the salads for dinner.The small oval fruit is widely cultivated in the Meditteranian region and is prime source of olive oil.
After coming to Kerala ..it was hard to get olives….now you get almost all the imported stuff here too.The recipe that I am posting out here is one that I got hold off during my visit to Bangalore .It was featured in a magazine.The best part of the recipe was my craze to use olives after a long time 😛

Olive Bread
650g of flour
2tsp of salt
4tsp of dry yeast
300ml of water
75ml of olive oil
200 gms of black olives pitted & chopped
1 big onion chopped
1 small bunch of parsley washed and chopped
Mix flour, salt ,water and yeast to make a soft dough.Mix together olive oil, onion, olives and parsley in a bowl.Knead this into the soft dough and keep it for fermentation for about 15 minutes.After 15 minutes tear the dough 4 portions.Shape into ovals and slash the top of each on a greased tray , cover with a wet muslin cloth and leave it for proving for about 1 1/2 hour. Preheat oven at 220 degree Celsius.Once fermented , line the dough on a greased baking tray and bake for about 20 minutes or till the crust becomes golden brown.


Nimi Surendran Kolatte (formerly published as Nimi Sunil Kumar) is an award-winning cookbook author, culinary historian, and culinary demonstrator based in Kerala, India. Her work focuses on documenting traditional Indian foodways, with a special emphasis on Kerala cuisine, through books, research, cooking classes, and global culinary demonstrations.
Utterly Gheely Ghee cake:)

Since the start of 2013, its been jam packed with my work schedules, classes and work on my new book.I have all my posts that are to be posted, but nothing quite seems to work out:(
This recipe is specially dedicated to Reshma Kaloor who has a flair for baking.Well..I hope ur doubts with the Ghee cake get cleared with this post.This recipe wouldn’t have popped up on my blog if u hadn’t asked.This super soft South Indian pound cake recipe is one that I really treasure for its spongy texture and the aroma of ghee.The recipe has been for long penned out in my diary and the courtesy of the recipe goes to Mrs.K.M Mathew.

Ghee Cake
1 cup of All purpose flour
1 tsp of Baking Powder
1/4 tsp of baking soda
1 cup of ghee
4 eggs seperated
1 cup of powdered sugar
2 tsp of lemon juice
1/2 tsp of lemon rind grated
1/2 cup of milk
2 tbsp of granulated sugar
1 tsp of vanilla essence

Separate egg whites and egg yolks.Sieve the flour ,baking powder and baking soda together in to a bowl and keep aside.Beat the powdered sugar and ghee with a whisk / mixer till it becomes fluffy and light.Beat in the eggs one by one at low speed.Mix in the lemon juice, rind and milk.At very low speed mix in the flour. Take an other bowl and whisk egg whites till stiff,add in granulated sugar and vanilla essence and whisk again till stiff.Now slowly fold in the egg whites with the cake batter.Preheat oven at 180 degree and bake the cake about 40 -45 minutes or till the skewer comes out clean.

Nimi Surendran Kolatte (formerly published as Nimi Sunil Kumar) is an award-winning cookbook author, culinary historian, and culinary demonstrator based in Kerala, India. Her work focuses on documenting traditional Indian foodways, with a special emphasis on Kerala cuisine, through books, research, cooking classes, and global culinary demonstrations.
A .com munching on Empanadas ;)!

I have been working on posting on my .com for the past days.This post for basically to be put up on my blog but it lagged from all the way from September to November.As its said that ‘better late than never’..heres my post on Emapanada Gallegas.
Empanada is a basically stuffed bread that’ s been baked or fried out .The roots of Empanadas lie in Spain & Portugal…though there are many variations in many countries.This post is dedicated to the DB challenge for September.Thanks to Patri for the awesome recipe.:)

Empanada Gallega
For the crust:
Ingredients
5-1/3 cups bread flour
2 cups of lukewarm water (about 85°F/30ºC), approximately
1 tablespoon fresh yeast
2 teaspoons salt
4 tablespoons oil
1 large egg, for egg wash
Sift the flour into a big bowl and make a well in the middle. Rub the yeast in with your fingers.In a small bowl, mix the water and the salt.Now, using your fingers or a wooden spoon, start adding the water and mixing it with the flour-yeast mixture. Keep on working with your fingers or spoon until you have added enough water and all the flour has been incorporated and you have a messy ball of dough.On a clean counter top, knead the dough for approximately 10 minutes.Clean and oil the big bowl you used for mixing and place the kneaded dough in it. Cover it with a napkin or piece of linen and keep it in a warm, drought-free place for approximately 40 to 50 minutes.Once risen, turn the dough back into a floured counter and cut it in half. Cover one half with the napkin to prevent drying.Spread the other half of the dough using a rolling pin. You can use a piece of wax paper over the counter, it will make it easier to move the dough around. Depending on the shape of your oven pan or cookie sheet, you will make a rectangle or a round.Now, the thinness of the dough will depend on your choice of filling and how much bread you like in every bite. For your first time, make it about 3mm thin (about 1/10th of an inch) and then adjust from that in the next ones you make.

For the filling:
3 medium sized Onions chopped
1 tbsp of ginger & Garlic chopped
5 green chillies finely chopped
2 cup of cooked shredded chicken
1/2 tsp turmeric powder
2 tsps of black pepper powder
1 tsp garam masala powder
curry leaves chopped
coriander leaves chopped
In a pan pour about 2 tbsps of oil,saute the ginger & garlic with the chopped onions till translucent.Add in the green chillies,and stir for a few minutes.Now add in the powders& chicken .drizzle oil on the sides of the pan stir fry the chicken mix with salt.Add 1/2 tsp of garam masala, coriander & curry leaves before turning of the flame.

Assembling
If you haven’t used wax paper, either lightly flour or line with wax paper your pan or tray.Cover the base and sides with the dough. Using the rolling pin or a knife, cut the extra dough.Place the filling, making sure it is cold and that all the base is covered. Using a hot filling will make the bottom layer of the empanada become soggy. Be careful to avoid adding too much oil from the filling, try to make it as “dry” as possible.Start preheating your oven to moderate 350°F/180ºC/gas mark 4.Take the other half of the dough and spread it out to the same or less thinness of the base. You can use a piece of wax paper for this too. Take into account that this “top” dough needs to be smaller around than the bottom, as it only needs to cover the filling.If not using wax paper, move carefully the top to cover the filling. If using wax paper, transfer the dough, turn upside down, cover the filling and gently peel off the wax paper.Using your fingers, join bottom and top dough, when you have gone all the way around, start pinching top and bottom together with your thumb and index finger and turning them half way in, that way you end up with a rope-like border.When you are finished, make a 1 inch hole in the middle of the top layer. This will help hot air exit the empanada while it’s baking without breaking the cover.Using a fork, prick the top layer or, using scissors, make snips that go all the way through the top layer.In a small bowl, beat an egg and add a tbsp of cold water. With the pastry brush, paint the top of the empanada with the egg wash. Place the empanada in the oven and bake for about 45 minutes. Check that the bottom part is done.

I made different shapes of empanadas..and loved simply baking them..Hope u too enjoy this Empanada Ride!


Nimi Surendran Kolatte (formerly published as Nimi Sunil Kumar) is an award-winning cookbook author, culinary historian, and culinary demonstrator based in Kerala, India. Her work focuses on documenting traditional Indian foodways, with a special emphasis on Kerala cuisine, through books, research, cooking classes, and global culinary demonstrations.
Oats and Coconut cookies to sweeten a happy moment!
I have been trying to update my food court since last month and the moment to write out came today.It was a total hectic month with my kids down with sickness and the happy moment was a write up on me in a magazine called FWD LIFE(march 2012 issue).Heres the link to the online issue of the magazine(page 58)http://www.fwdlife.in/emagazine/march2012.html


Nimi Surendran Kolatte (formerly published as Nimi Sunil Kumar) is an award-winning cookbook author, culinary historian, and culinary demonstrator based in Kerala, India. Her work focuses on documenting traditional Indian foodways, with a special emphasis on Kerala cuisine, through books, research, cooking classes, and global culinary demonstrations.
A scoop of vanilla with Chocolate nd Coffee..

Here in Munnar the winter is on its way with misty evenings and quite chill nights.So how have all of u been?Although 6 days late I really wanted to post in this months Sweet punch.If you love chocolate and coffee like me this recipe is a real knock out and to top all this you can have the tang of vanilla with ice cream.
So hop on to the recipe with a scoopy scoop..

Saucy Coffee and Chocolate Pudding
2 tsp baking powder
2 tsp cocoa
Pinch of salt
½ cup brown sugar
2 tbsp butter, melted
½ cup milk
1 egg, beaten
50g almonds , chopped
For the topping
3 tbsp cocoa
1 cup strong black coffee

Nimi Surendran Kolatte (formerly published as Nimi Sunil Kumar) is an award-winning cookbook author, culinary historian, and culinary demonstrator based in Kerala, India. Her work focuses on documenting traditional Indian foodways, with a special emphasis on Kerala cuisine, through books, research, cooking classes, and global culinary demonstrations.
Buttery Croissants ..perfect with your morning Coffee!

Croissants have always fascinated me..there were times when I used to think that if I would ever be able to make them at home.This flaky buttery beauty is quite time consuming ..but you are sure to forget them in taste.Thanks to Sarah for choosing ‘Croissants ‘ for September’s DB challenge!I loved trying it and tasting it whole heartedly!


Croissants
1¼ teaspoon of dry-active yeast
3 tablespoons warm water (less than 100°F/38°C)
1 teaspoon sugar
1 3/4 cups of strong plain flour
2 teaspoons sugar
1½ teaspoon salt
½ cup milk
2 tablespoons oil
½ cup chilled, unsalted butter
1 egg, for egg wash


2. Measure out the other ingredients
3. Heat the milk until tepid (either in the microwave or a saucepan), and dissolve in the salt and remaining sugar
4. Place the flour in a large bowl.
5. Add the oil, yeast mixture, and milk mixture to the flour
6. Mix all the ingredients together using the rubber spatula, just until all the flour is incorporated
7. Turn the dough out onto a floured surface, and let it rest a minute while you wash out the bowl
8. Knead the dough eight to ten times only. It’s a little difficult to explain, but essentially involves smacking the dough on the counter (lots of fun if you are mad at someone) and removing it from the counter using the pastry scraper.
9. Place the dough back in the bowl, and place the bowl in the plastic bag
10. Leave the bowl at approximately 75°F/24°C for three hours, or until the dough has tripled in size.
12. Place the dough on a lightly floured board or countertop, and use your hands to press it out into a rectangle about 8 by 12 inches (20cm by 30cm).
13. Fold the dough rectangle in three, like a letter (fold the top third down, and then the bottom third up)
14. Place the dough letter back in the bowl, and the bowl back in the plastic bag.
15. Leave the dough to rise for another 1.5 hours, or until it has doubled in size. This second rise can be done overnight in the fridge
17. Once the dough has doubled, it’s time to incorporate the butter
18. Place the block of chilled butter on a chopping board.
19. Using the rolling pin, beat the butter down a little, till it is quite flat.
20. Use the heel of your hand to continue to spread the butter until it is smooth. You want the butter to stay cool, but spread easily.
22. Spread the dough using your hands into a rectangle about 14 by 8 inches (35 cm by 20 cm).
23. Remove the butter from the board, and place it on the top half of the dough rectangle
24. Spread the butter all across the top two-thirds of the dough rectangle, but keep it ¼ inch (6 mm) across from all the edges. Fold the top third of the dough down, and the bottom third of the dough up.
26. Turn the dough package 90 degrees, so that the top flap is to your right (like a book).
27. Roll out the dough package (gently, so you don’t push the butter out of the dough) until it is again about 14 by 8 inches (35 cm by 20 cm).
28. Again, fold the top third down and the bottom third up.
29. Wrap the dough package in plastic wrap, and place it in the fridge for 2 hours.
31. Tap the dough with the rolling pin, to deflate it a little
32. Let the dough rest for 8 to 10 minutes
33. Roll the dough package out till it is 14 by 8 inches (35 cm by 20 cm).
34. Fold in three, as before
35. Turn 90 degrees, and roll out again to 14 by 8 inches (35 cm by 20 cm).
36. Fold in three for the last time, wrap in plastic, and return the dough package to the fridge for two more hours (or overnight, with something heavy on top to stop it from rising)
38. First, lightly butter your baking sheet so that it is ready
39. Take the dough out of the fridge and let it rest for ten minutes on the lightly floured board or counter
40. Roll the dough out into a 20 by 5 inch rectangle (51 cm by 12½ cm).
41. Cut the dough into two rectangles (each 10 by 5 inches (25½ cm by 12½ cm))
42. Place one of the rectangles in the fridge, to keep the butter cold
43. Roll the second rectangle out until it is 15 by 5 inches (38 cm by 12½ cm).
44. Cut the rectangle into three squares (each 5 by 5 inches (12½ cm by 12½ cm))
45. Place two of the squares in the fridge
46. The remaining square may have shrunk up a little bit in the meantime. Roll it out again till it is nearly square
47. Cut the square diagonally into two triangles.
48. Stretch the triangle out a little, so it is not a right-angle triangle, but more of an isosceles
49. Starting at the wide end, roll the triangle up towards the point, and curve into a crescent shape.
50. Place the unbaked croissant on the baking sheet
51. Repeat the process with the remaining squares of dough, creating 12 croissants in total.
52. Leave the tray of croissants, covered lightly with plastic wrap, to rise for 1 hour
54. Mix the egg with a teaspoon of water
55. Spread the egg wash across the tops of the croissants.
56. Put the croissants in the oven for 12 to 15 minutes, until the tops are browned nicely
57. Take the croissants out of the oven, and place them on a rack to cool for 10 minutes before serving.

Nimi Surendran Kolatte (formerly published as Nimi Sunil Kumar) is an award-winning cookbook author, culinary historian, and culinary demonstrator based in Kerala, India. Her work focuses on documenting traditional Indian foodways, with a special emphasis on Kerala cuisine, through books, research, cooking classes, and global culinary demonstrations.
Fruity choco muffins with a punch!

Hi foodies..I’m back after my holiday break.July has been a month with heavy rains in Munnar.The holidays fly by with ease and I’m all over again in my busy bee schedule. Today’s post goes out to the Sweet punch team.The recipe for this month sought out for strawberries..but the sad prt was that I couldnt get hold of any to pop into my batter.So I thought of giving it a bit of twist.If you love a fruit blast for your kids heres one Banana Apple choco muffins..

Banana Apple Choco Muffins
Preheat oven to 350 degrees F . Place a rack in the center of the oven. Line a muffin pan with paper liners .

Nimi Surendran Kolatte (formerly published as Nimi Sunil Kumar) is an award-winning cookbook author, culinary historian, and culinary demonstrator based in Kerala, India. Her work focuses on documenting traditional Indian foodways, with a special emphasis on Kerala cuisine, through books, research, cooking classes, and global culinary demonstrations.
Khara Biscuits for ICC!

I’m so happy that Srivalli chose Khara biscuits of Iyengar bakery(Karnataka special) as this months ICC.If you are looking for something to munch of with a hot cup of tea when its raining..this biscuit is perfect with the spice of chillies and the aroma of cilantro.The best part is that these cookies can be stored in airtight containers for about 4 days.
My husband was quite addicted to these biscuits..guess its bcz he craves masala biscuits…:)

Here’s the recipe
Iyengar bakery Khara biscuit
2 cups of all purpose flour
1/3 cup softened butter
5-6 green chilies chopped
4 tsp sugar
1tsp salt
coriander leaves/cilantro a few twigs chopped
2-3 tbsp yogurt(i used 4 tbsp yogurt)
Preheat oven to 160 degree
Prepare the baking tray with an aluminium foil sheet smeared by a few drops of vegetable oil/cooking spray.
Whisk the flour and salt together in a bowl.
In an other bowl beat the sugar and butter till creamy.Now add in the yogurt.
Mix in the flour(you will have to use your hands ) and incorporate well to make a dough.
Do not use too much of pressure.
Roll the dough into 1/4 inch thickness and cut out round shapes with a cookie cutter.
Line them in the prepared tray and bake for about 18-20 minutes.
If you want more crispier biscuits you can bake for a few for minutes.
Cool them on a wire rack and transfer into airtight containers.
Happy Munchhing..!

Nimi Surendran Kolatte (formerly published as Nimi Sunil Kumar) is an award-winning cookbook author, culinary historian, and culinary demonstrator based in Kerala, India. Her work focuses on documenting traditional Indian foodways, with a special emphasis on Kerala cuisine, through books, research, cooking classes, and global culinary demonstrations.
Wheat Almond Cookies for this months Sweet Punch!
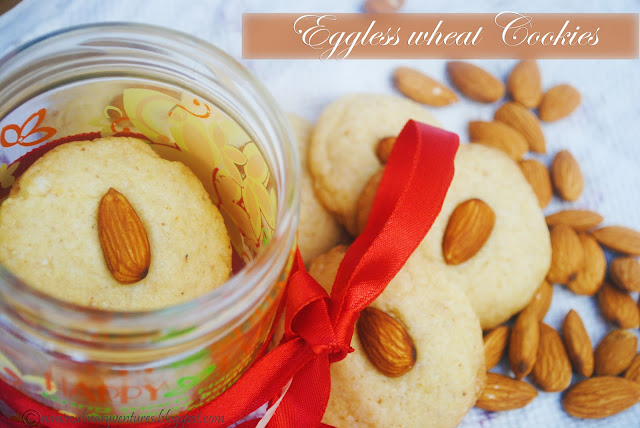
This months punch ..Wheat Almond Cookies.. was chosen by Ria from Manjula’s Kitchen .If you are in a mood to bake out cookies super quick and simple this is the best recipe.My modifications to the recipe was that I added almond meal to the dough in lieu to the sliced almonds and topped the cookies with almonds.I did lessen the sugar to about 3 tbsps.
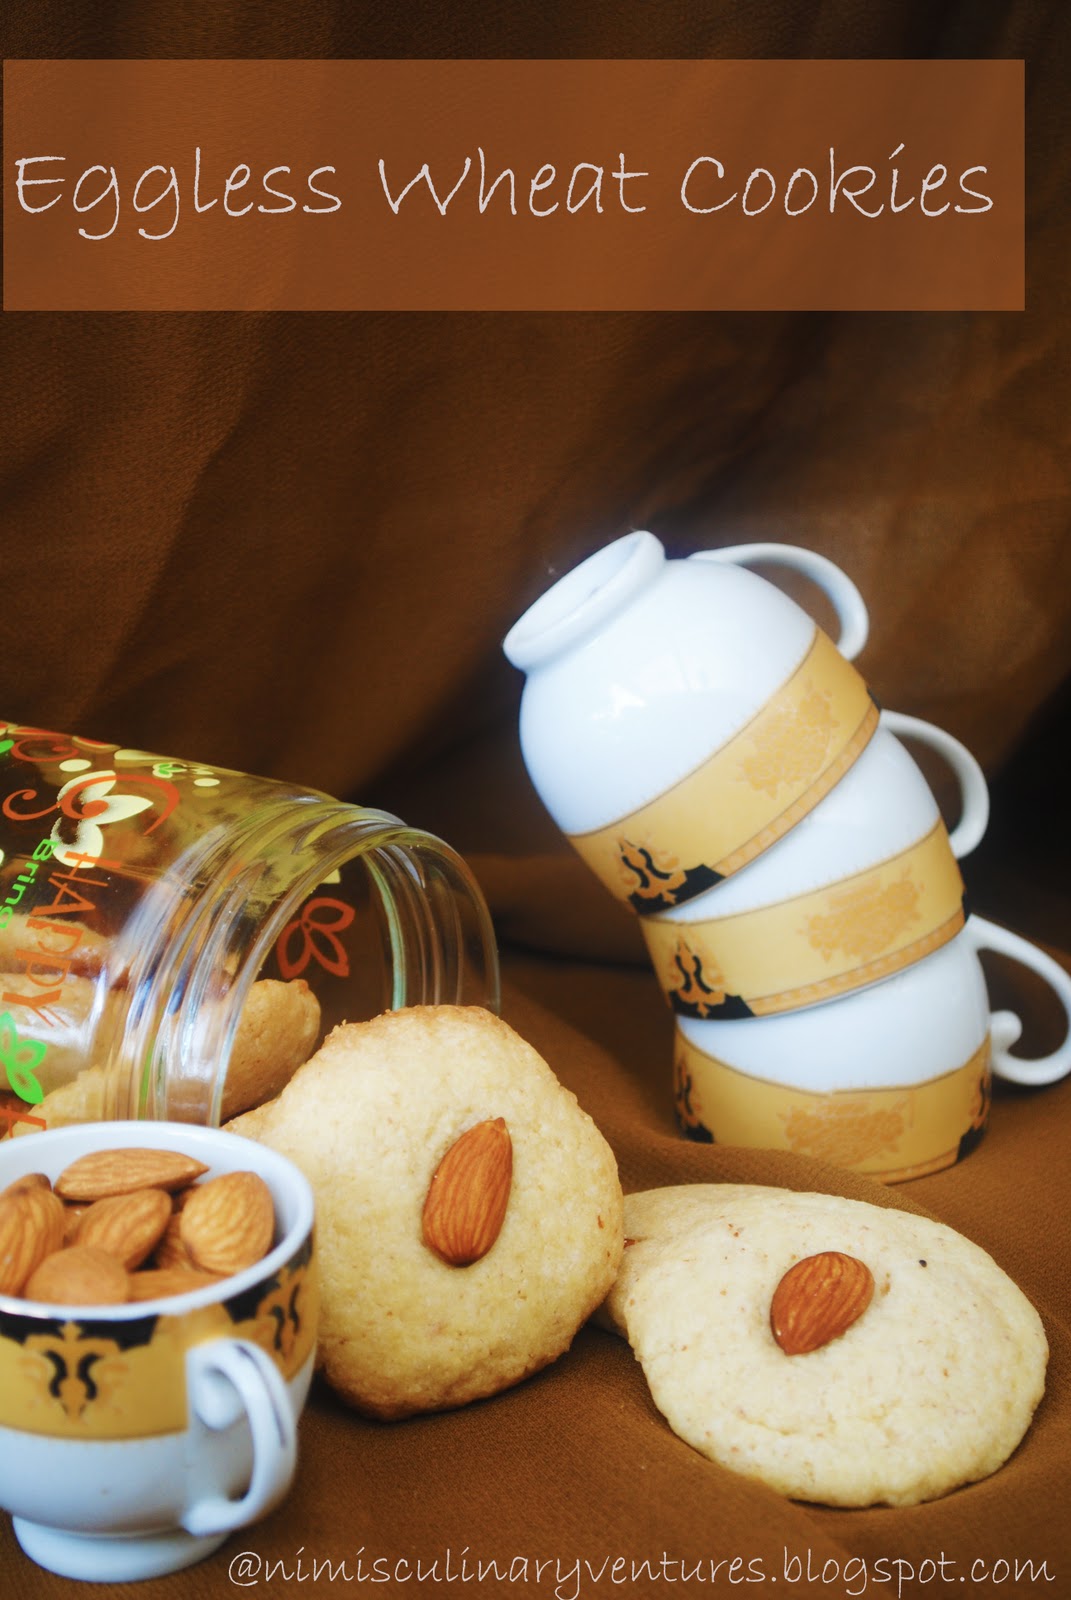
Here’s the recipe for this crunchy delight..
EGGLESS WHEAT ALMOND COOKIES
1 cup Whole wheat flour
1/2 cup castor sugar
1/4 tsp salt
1/4 tsp elaichi coarsely powdered
1/2 cup Butter
2 tbsp milk

- Preheat the oven to 360 degrees farenheit.
- In a bowl mix flour,sugar,salt,sliced almonds and cardamom powder.
- Add soft butter and milk to the mix and knead it into a soft dough.
- Divide the dough into 24 equal parts and roll them into balls.
- Press each ball between palms tp half inch thickness and place them on cookie sheets about an inch apart.
- Bake for 18 mins till light brown.
- Let cookies cool for about 2 to 3 mins before taking them off the cookie sheets
Store the cookies in an airtight container and ..MUNCH on 🙂

Nimi Surendran Kolatte (formerly published as Nimi Sunil Kumar) is an award-winning cookbook author, culinary historian, and culinary demonstrator based in Kerala, India. Her work focuses on documenting traditional Indian foodways, with a special emphasis on Kerala cuisine, through books, research, cooking classes, and global culinary demonstrations.
Christmas n Cakes!
May the Joys of the season
Fill your heart with goodwill and cheer.
May the chimes of Christmas glory
Add up more shine and spread
Smiles across the miles,
To-day & In the New Year.


Nimi Surendran Kolatte (formerly published as Nimi Sunil Kumar) is an award-winning cookbook author, culinary historian, and culinary demonstrator based in Kerala, India. Her work focuses on documenting traditional Indian foodways, with a special emphasis on Kerala cuisine, through books, research, cooking classes, and global culinary demonstrations.
Hi, I’m Nimi Surendran Kolatte
Award-winning cookbook author • Culinary historian • Culinary demonstrator


